
How to Make Routines Work for You and Your Clients on Pomp
As an esthetician, creating personalized skincare routines can feel like juggling a dozen products and preferences at once. That’s where Pomp comes in—making it easy to build, customize, and share routines that your clients will love.
Routines not only help your clients follow your professional recommendations step by step, but they also allow them to shop for their full skincare routine directly through you, rather than looking elsewhere.
Whether you’re prepping for a treatment, recommending at-home care, or showcasing seasonal favorites, Pomp’s routine tools keep everything organized and professional.
Here’s a step-by-step guide to creating a routine.
1. Access Routine Templates
Log in to Pomp. From the left navigation menu, click Routines, then select Routine Templates.
Think of this as your personal library of go-to routines. From acne-fighting favorites to post-treatment essentials, this is where all your tried-and-true routines live.
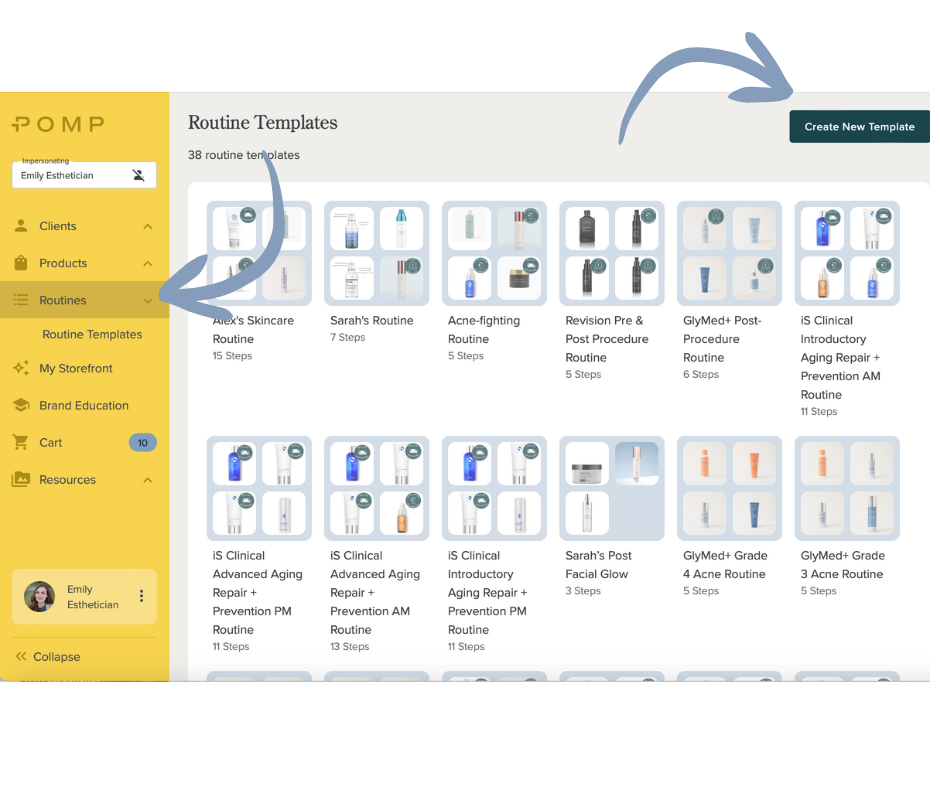
2. Create a Routine Template
Click Create New Template in the top right corner.
Here’s what you’ll do next:
Name your routine – Examples: “Morning Skincare Routine,” “Sensitive Skin Routine,” “Rosacea Routine.”
Add a description (optional, but helpful for clarity).
Select when the routine is performed: Morning, Night, or Anytime.
Decide on visibility: make it Public so anyone can access it, or Private for select users only.

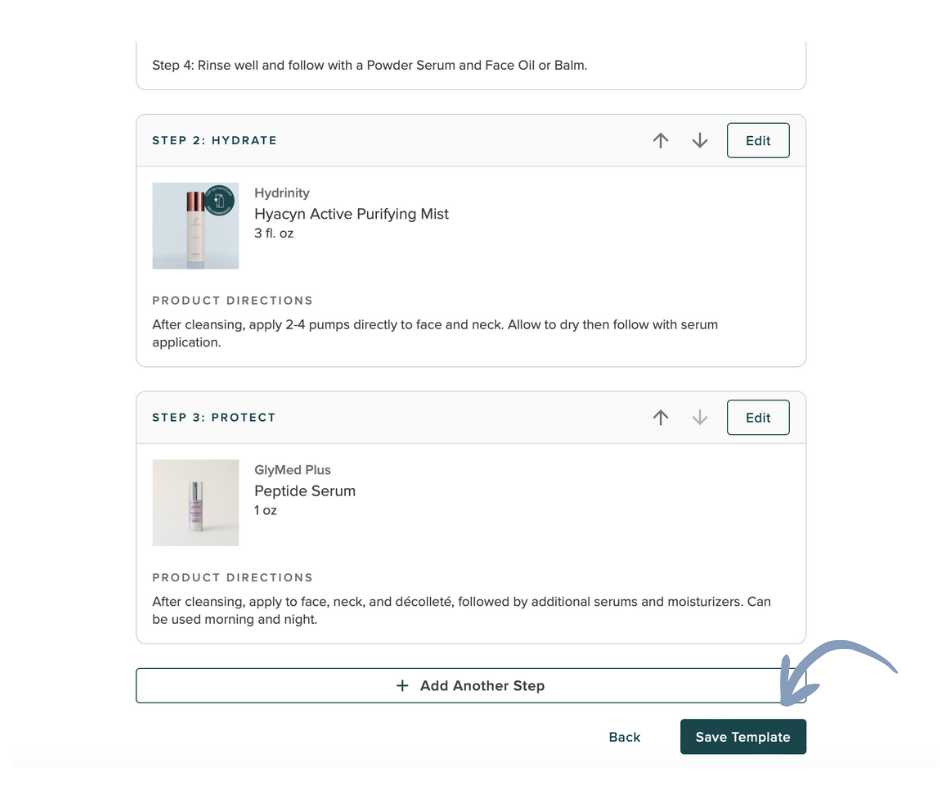
3. Add Routine Steps
Build the routine step by step:
Name each step (Cleanse, Tone, Hydrate, etc.).
Select a product from Pomp’s store for each step.
Add custom notes if necessary (product directions auto-fill from Pomp’s system).
Make sure every routine has at least one step, then repeat the process until your routine is complete.

4. Save the Template
Once all your steps are in place, hit Save Template. Your routine is now safely stored in your library—ready to be edited, shared, or assigned whenever you need it.
5. Assign a Template to a Client
To put a routine directly into a client’s hands:
Open the routine template you want to assign.
Click the three dots on the far right, then select Add Template to Client.
Search for and select your client from the list.
Customize if needed—adjust steps or add products specific to your client.
Click Save and Close.
The routine is now live on your client’s account. They can view it, follow it, and shop your recommended products directly through you.

6. Share a Public Routine
If you want a routine to reach more clients—think seasonal tips, promotions, or educational content—make it Public.
After saving, access the template and copy the public link. You can share it anywhere:
Social media
Newsletters
Emails
Other marketing channels
Clients clicking the link will see your professional recommendations and can interact with the routine directly.

Tips
Start with templates to save time—no need to reinvent the wheel every time.
Customize routines for each client to keep your recommendations relevant.
Use public routines to educate or market your services.
Video tutorial: Watch on Loom